learn about all things surface pattern design including the creative design process, being a successful creative entrepreneur & stepping into the mindset of a successful designer
welcome to the pattern design blog
blog
The
Categories
Popular
How to Create Glitter Texture in Photoshop
If you’re creating graphics to go with any of your surface pattern designs or are looking to add a bit of a sparkle to your surface pattern designs, have you considered adding a touch of glitter? Creating your very own glitter texture from scratch is actually really simple. So here’s a quick tutorial on how to create glitter texture in Photoshop.
I’ve created a video for you to watch step by step and have also included a written tutorial below.
How to Create Glitter Texture in Photoshop
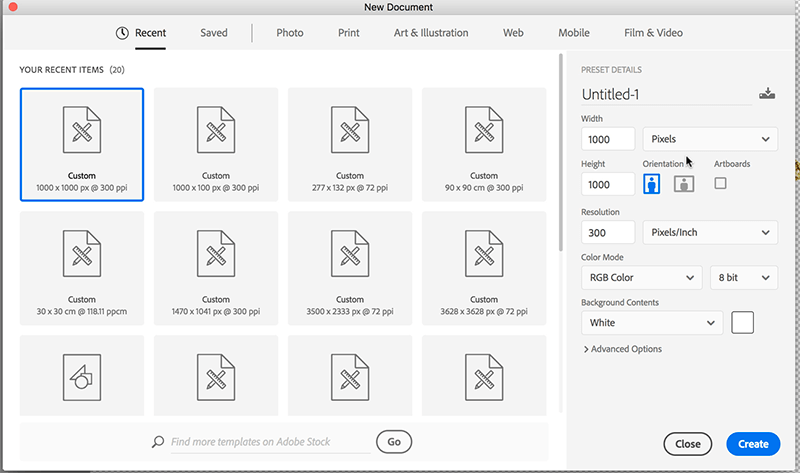
Create a new canvas.
I created mine 1000 px x 1000 pixels, 300dpi, RGB, white background but you can create yours any size you like.
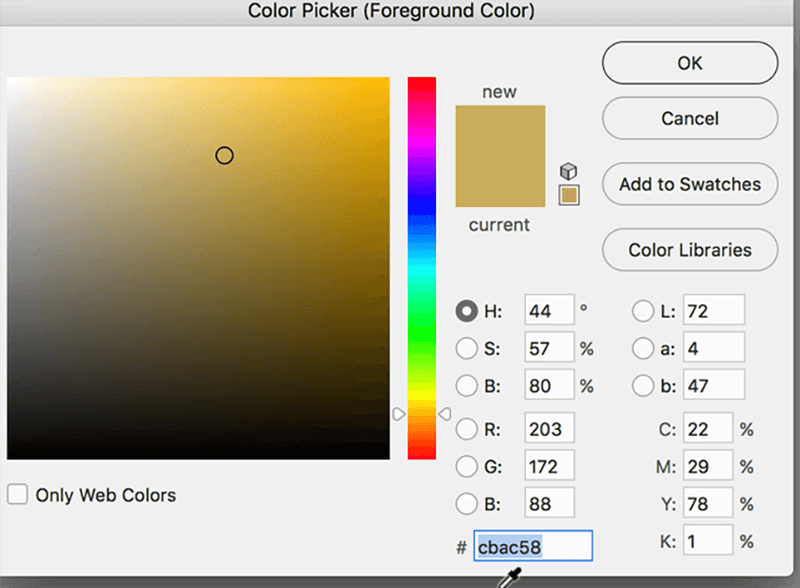
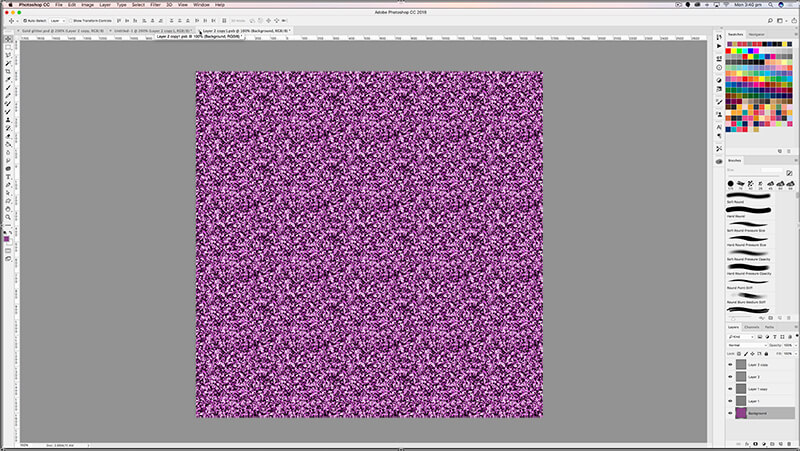
Fill the canvas with the colour you’d like your glitter to be. I created mine with colour hex value #cbac58
There are many different ways to fill your canvas with colour, here are 2 options:
Edit > Fill or you can use the shortcut Option + Delete (MAC) / Alt + Backspace (PC)
Go to the bottom of your layers panel and click on create a new layer
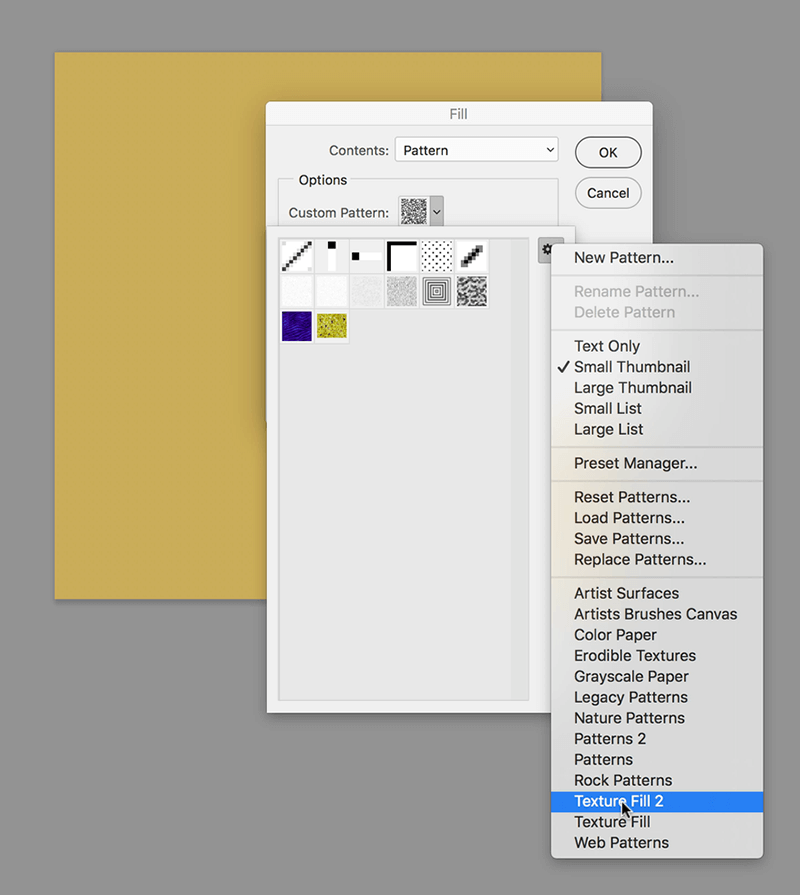
With the new layer selected go to Edit > Fill >Pattern > Custom Pattern. Select the Cog while on the top right-hand side and then select Texture Fill 2 then append.
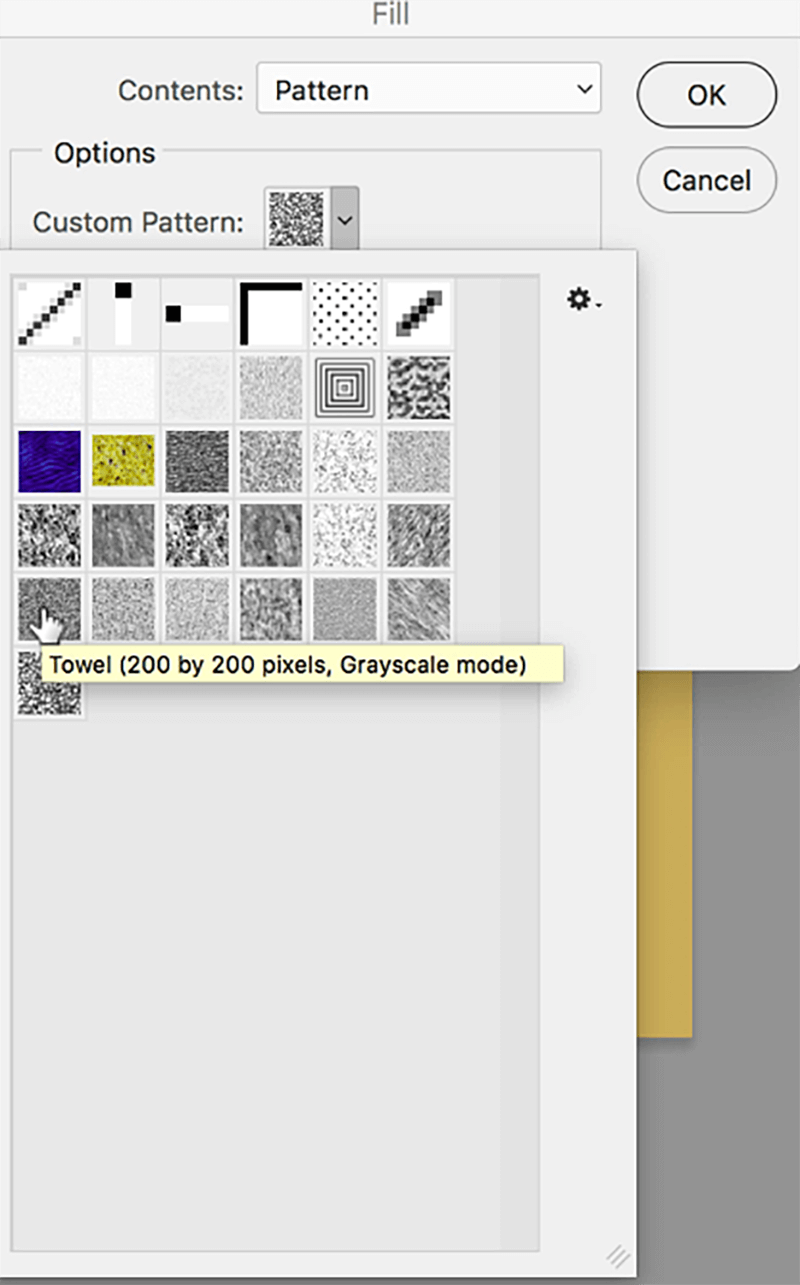
Select the texture called Towel.
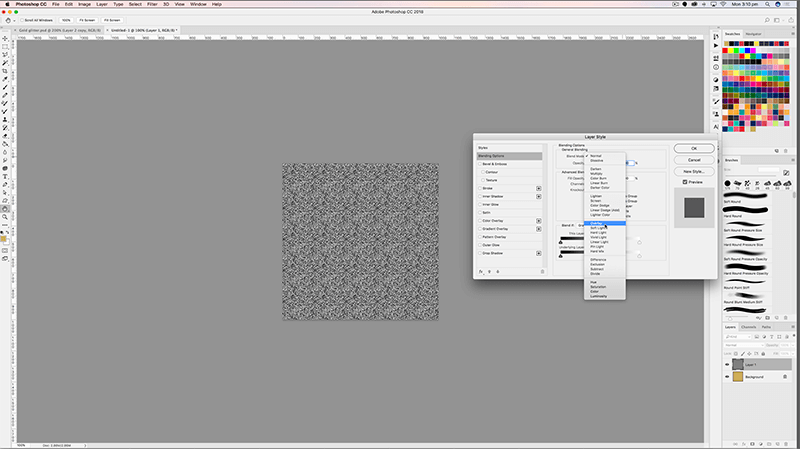
Go back to the layer. Double click on the layer to bring up the layer style.
In the blend mode drop down menu select overlay. Alternatively, you can also change the blend mode in the drop-down menu at the top left of the layers panel that says ‘normal’
Duplicate that layer by selecting Command + J (MAC)/ Control + J (PC) then select Command + T (MAC) /Control + T (PC) to bring up the transform tool. Right-click and select rotate 90 degrees.
Create a new layer. Go to Edit > Fill > Pattern > Custom Pattern. Then select the texture called Web (the last one in the list).

Go back to the layers panel, open the layers style panel and change the blend mode to soft light.
Duplicate this layer by selecting Command + J/ Control + J (PC) then select Command + T/ Control + T (PC) to bring up the transform tool. Right-click and select rotate 90 degrees.
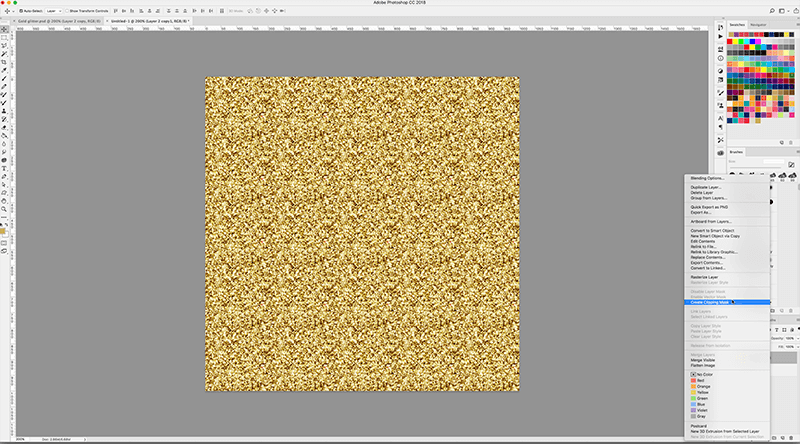
Click on the top layer, hold shift then click on the bottom layer. All layers should now be selected. Right-click and select Convert to Smart Object.
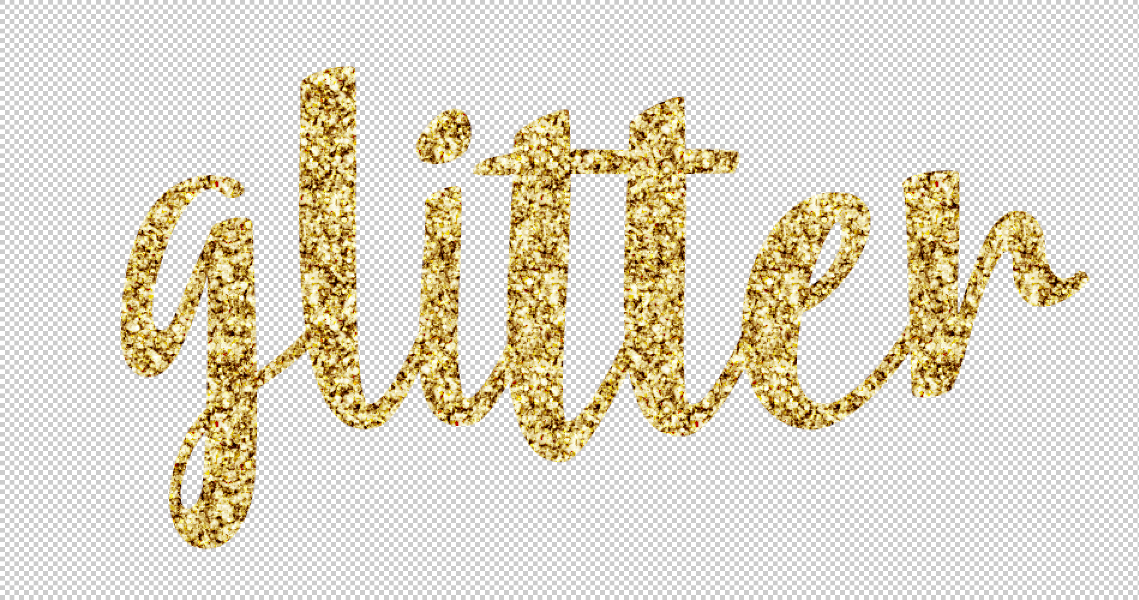
Now to add the texture to text.
Create a new layer. Type your text.
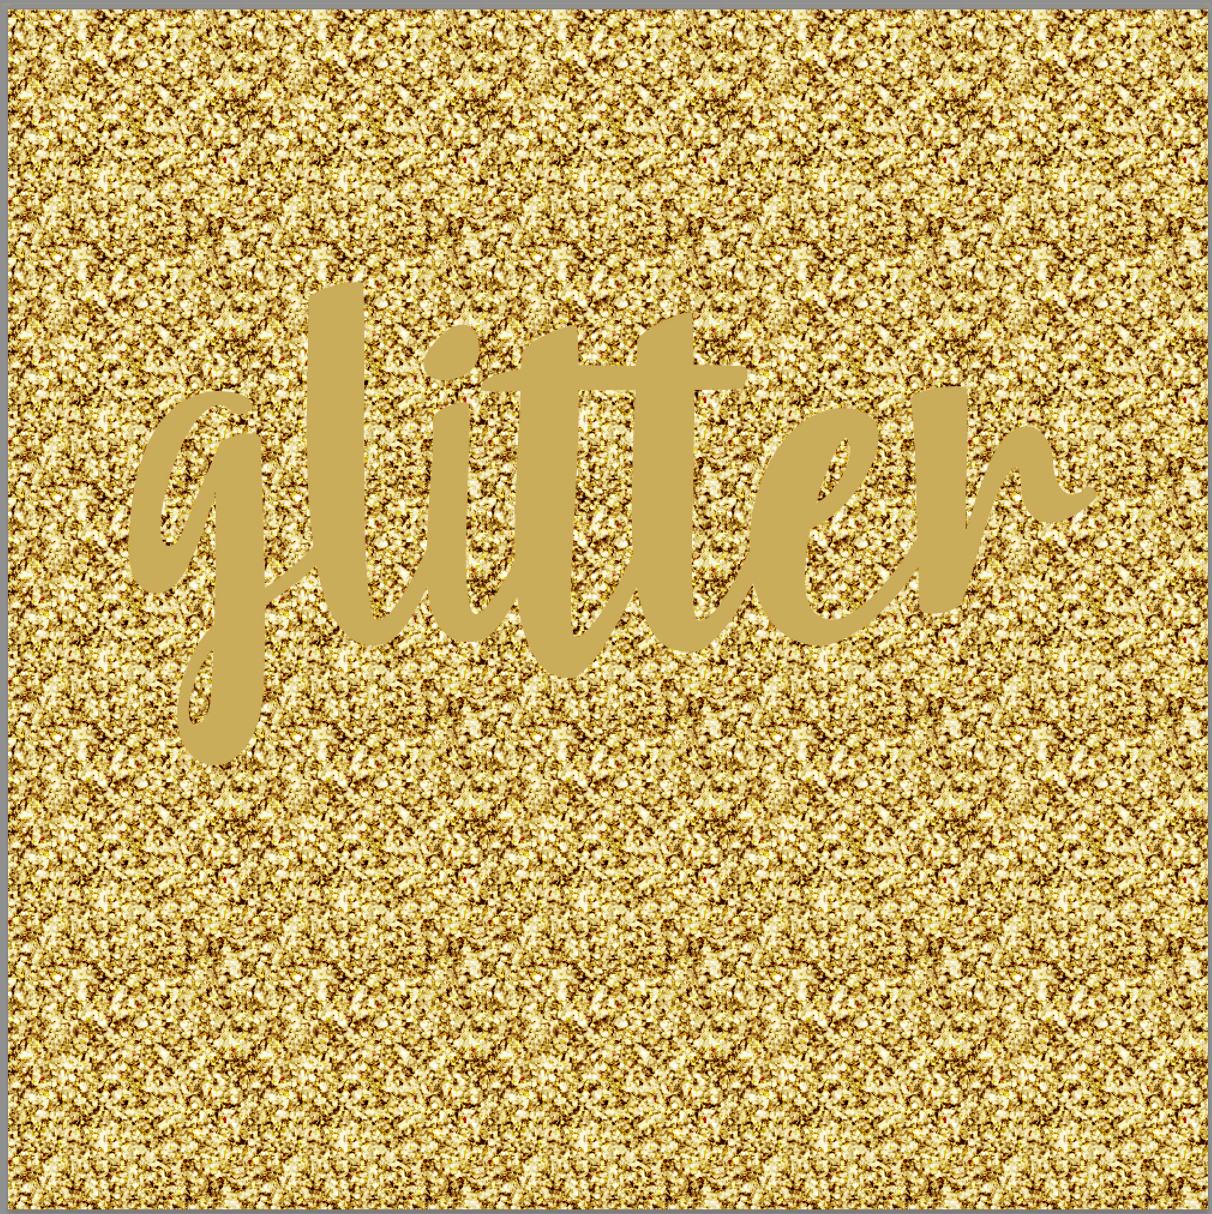
Select the layer with the type, click and drag so that it is below the layer with the glitter texture.
Click on the layer with the glitter texture, right-click then select Make Clipping Mask.
To change the colour of the glitter, double-click on the Smart object layer with your glitter texture.
A new window will be opened with all the original layers you created the glitter with.
Select the bottom layer with the fill colour. Change the colour to the new glitter colour.
Click to close the window, a dialog box will pop up asking you to save your changes.
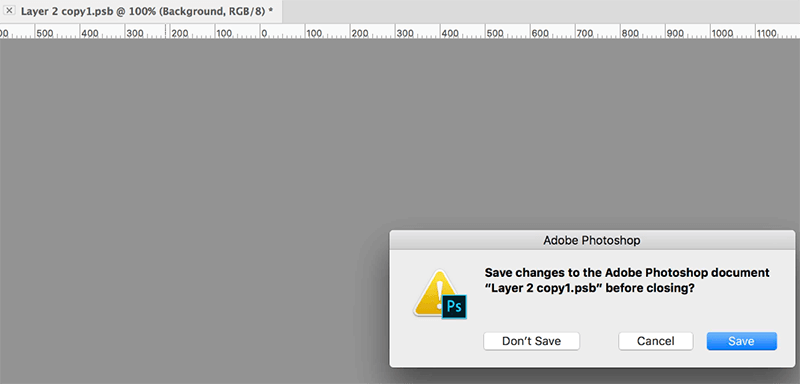
Select save.
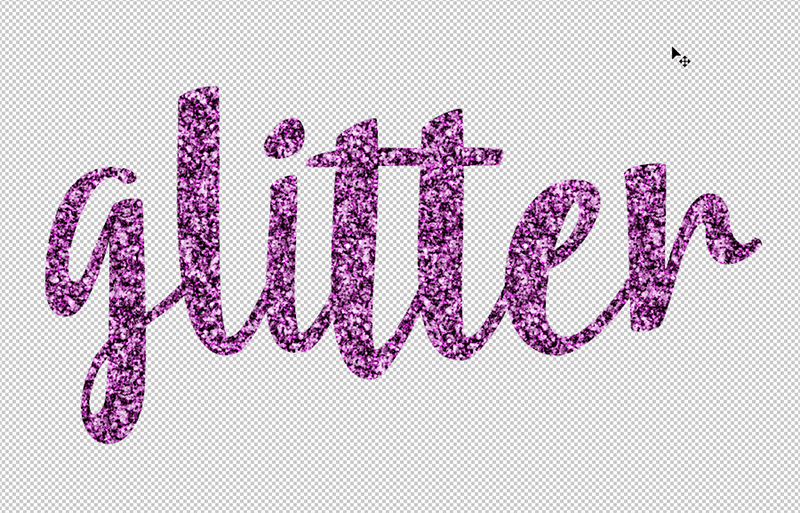
As we used a pattern fill to create our glitter texture, it has been created in repeat so if you want to you could create some sparkle to an element of your designs
Want to create another revenue stream by turning your art into surface pattern designs?
Get the free guide
Get my FREE Surface Pattern Design Starter Guide


